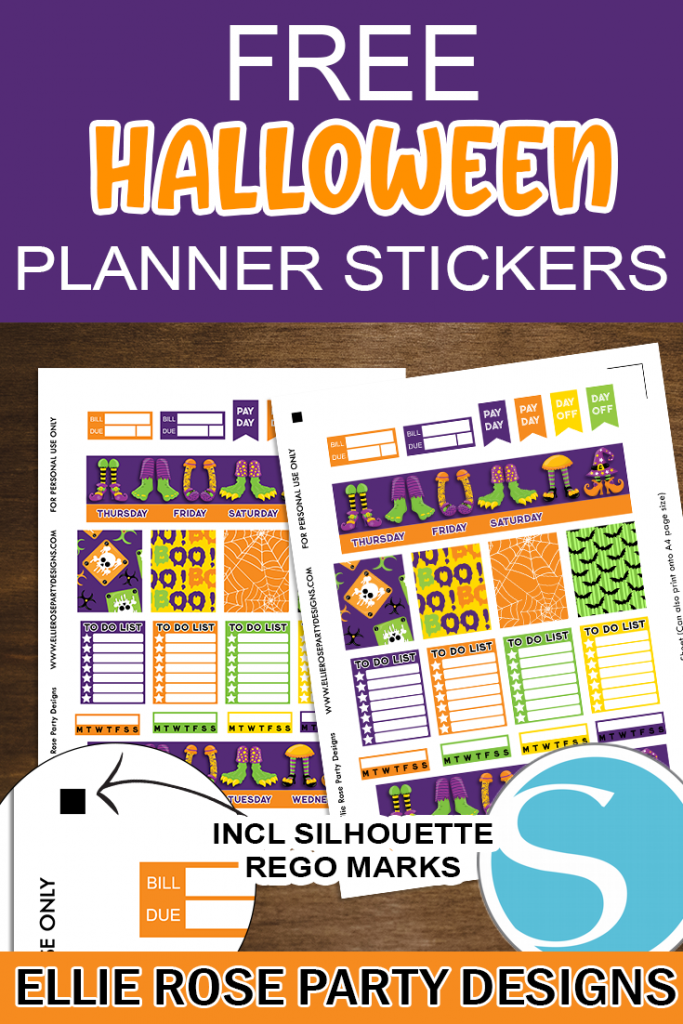
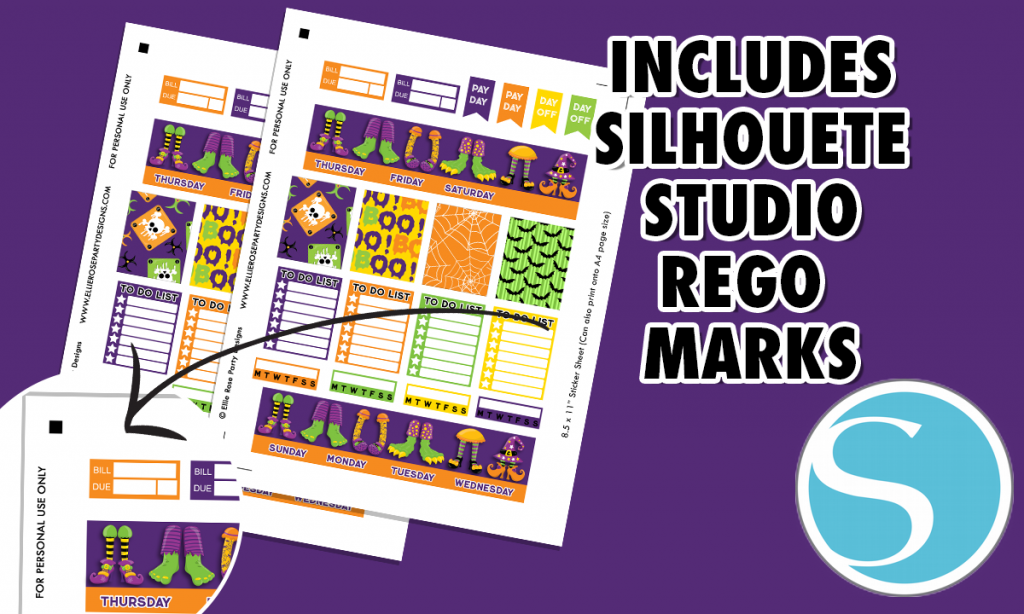
Free Halloween Planner Stickers
What's Included in the Download?
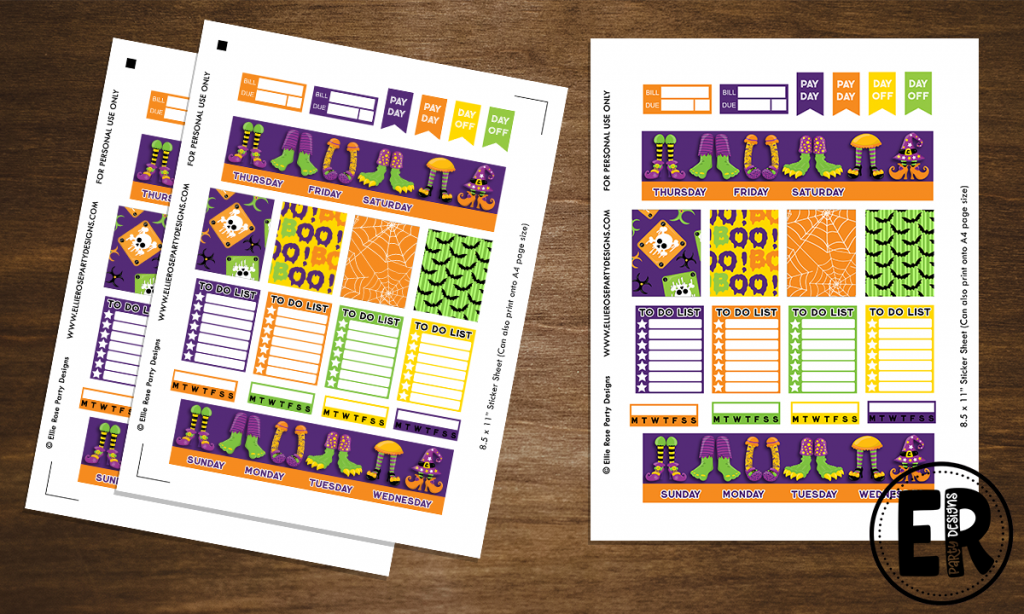
- 1 x Halloween Monster Planner Printable PDF (US letter with registration marks for Silhouette Studio Users)
- 1 x Halloween Monster Planner Printable US Letter PDF
- 1 x Halloween Monster Planner Printable A4 PDF (with registration marks for Silhouette Studio Users)
- 1 x Halloween Monster Planner Printable US Letter PDF
- High Resolution PDF file, 300 dpi
What You Will Need
- Download your printable (PDF file)
- Printer
- White Sticker Paper
- Scissor (if cutting by hand)
- Silhouette Studio Cutting Machine (optional) or
- Cricut Cutting Machine (optional)
How To Use:

How To Import a PDF or PNG File into Silhouette Studio:
Did you know you can import a PDF file into Silhouette Studio? Learn how to below

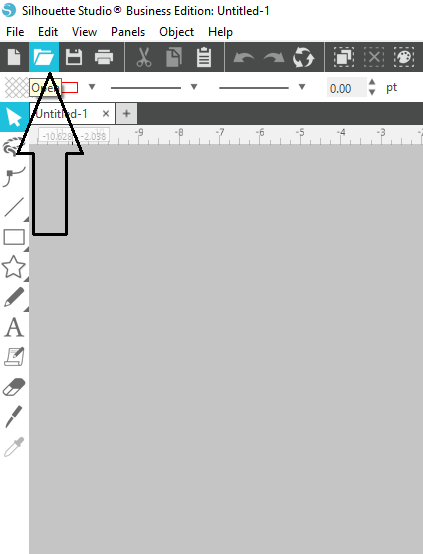
Step 1: We can import your PDF file by selecting File – Open or the short cut you can click the file open icon
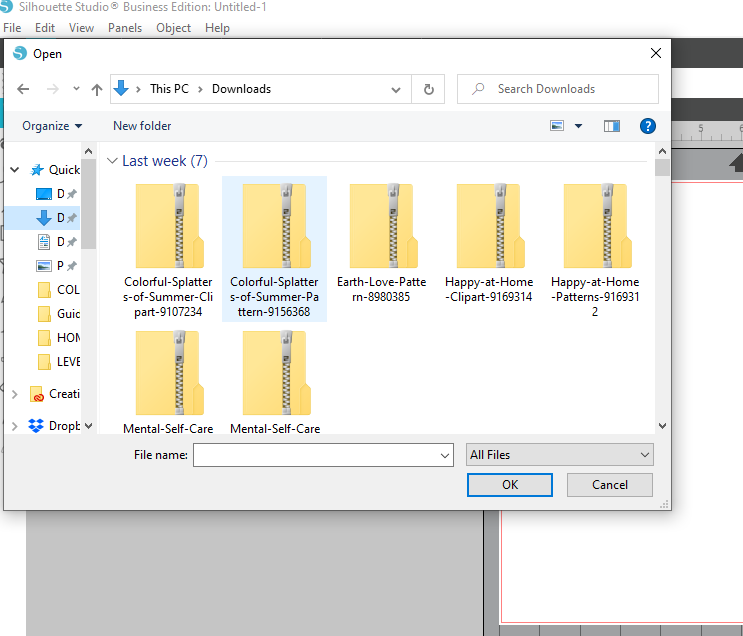
Step 2: Find your PDF file, click on it and then click OK. It will take a few seconds to load.
You will then see a pop up window appear on your Silhouette Cameo screen
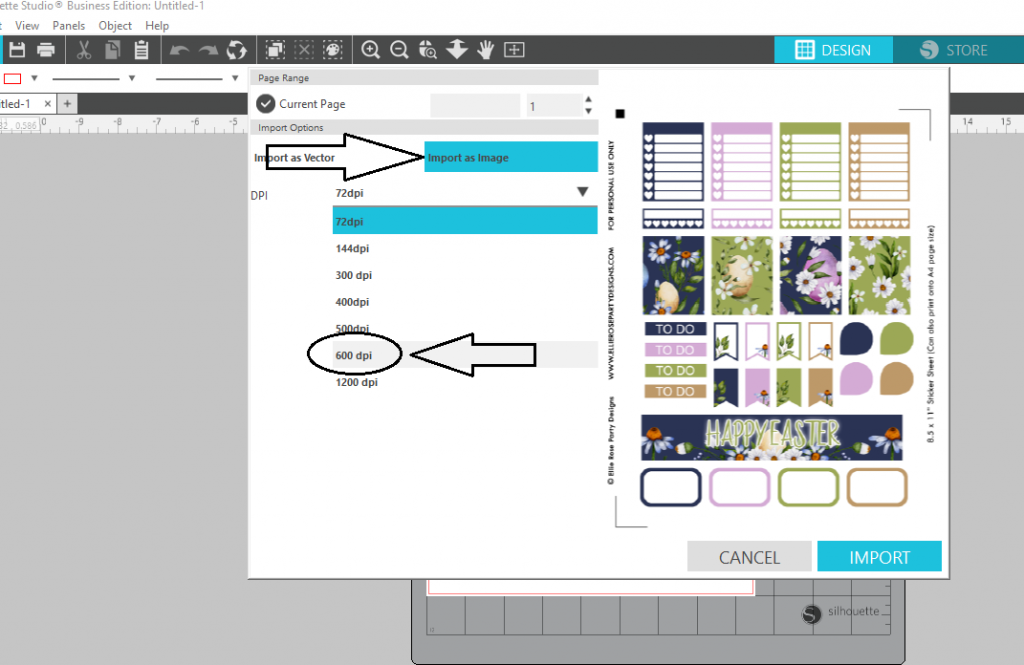
Step 3: We want to import the PDF file as a image (it is always best to print from your computer and not from Silhouette Studio. The quality is much better) – select importers image
Select 600 DPI – if you are not going to print from this file (in Silhouette Studio), it is always best to import your files at a higher quality – this will create better cut marks and line for you
Click Import
How To Use The PDF File with Registration Marks:
This step only applies if you are using the PDF file that has Silhouette Studio registration marks
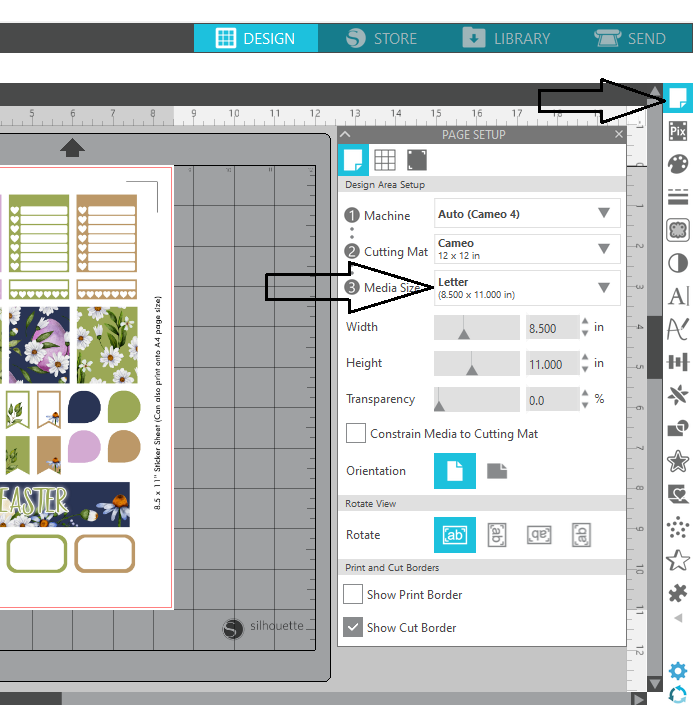
Once your PDF / PNG file has been imported, you will notice that the page Set Up panel opens up. If it doesn’t open up, go to the icon where shown in the image above.
Ensure your page size is the size you will be printing on (A4 or US Letter size etc)
Now let’s click on the last tab under page setup (highlight in blue on the image above). This is called registration marks. This is where we will let Silhouette Studio know what the registration marks size are for the file or image we have imported in.
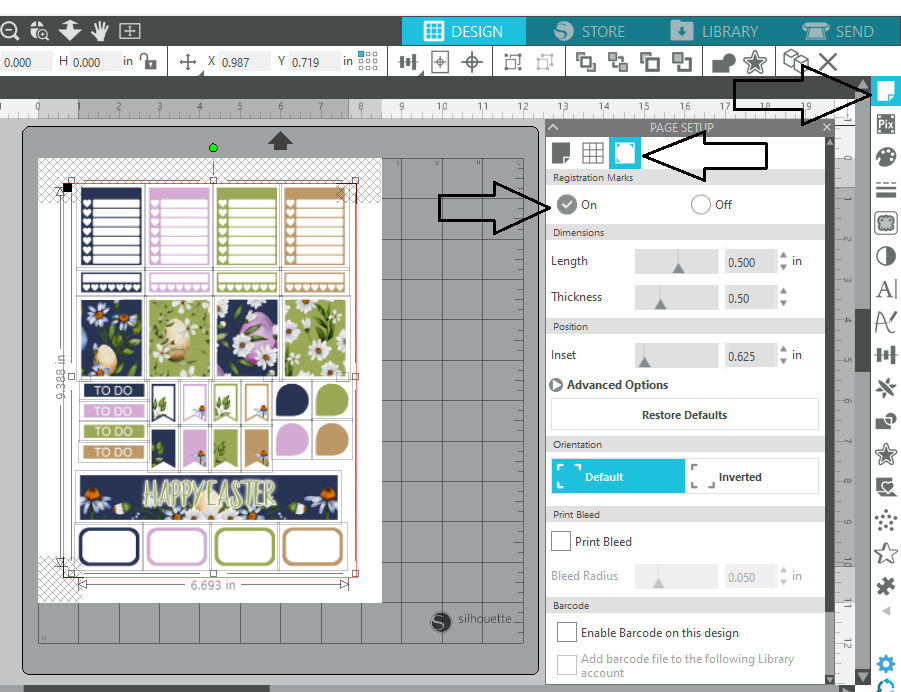
Click ON. This will turn on your registration marks.
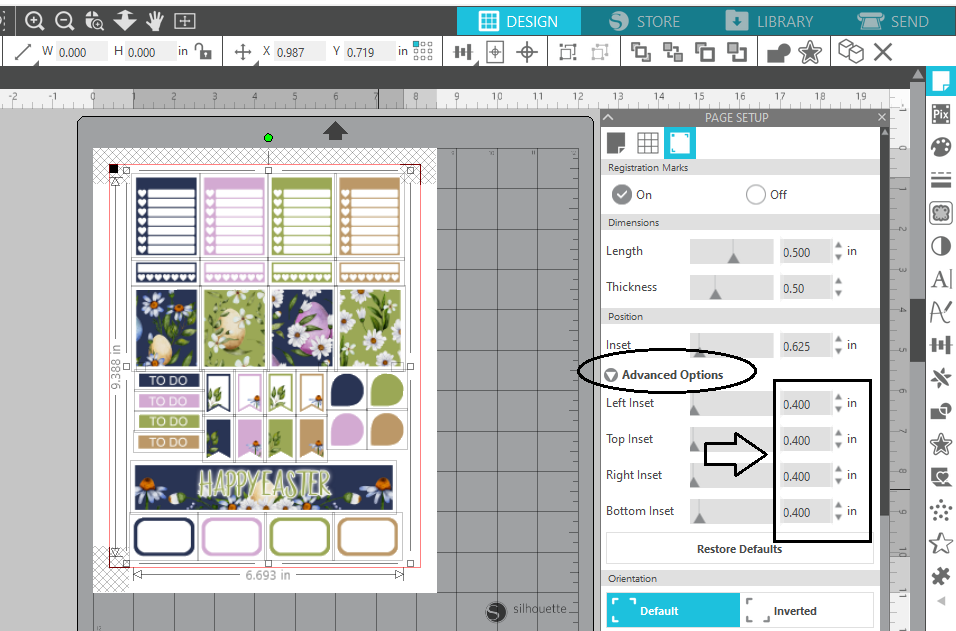
Then go down to Advanced Options and click the drop down arrow. This is where you will amend the registration mark settings.
Amend all four setting options (left, top, right and bottom) to 0.400 in. By changing the settings to 0.400 in, we are changing them to the exact same settings we have created already on our PDF file.
This is letting Silhouette Studio know that we have new registration marks.
And when we print out our registration marks PDF file (that we have already saved onto our computer), we will have the same information as we do on the Silhouette Studio software and our cut marks will match up perfectly.
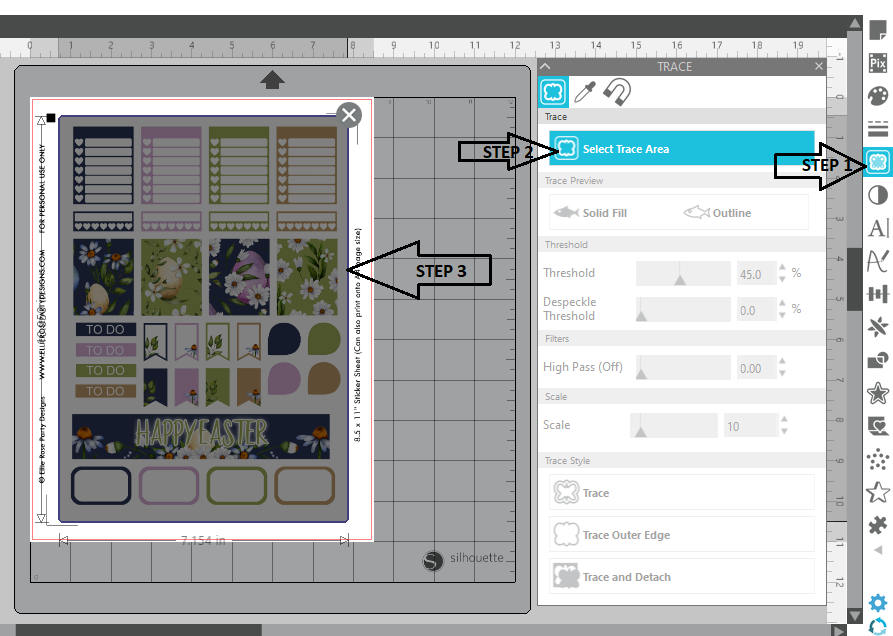
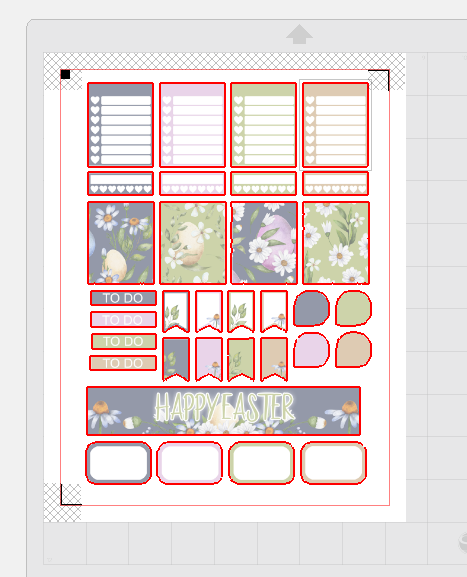
Ok, let’s move onto the trace panel tab. (Step 1). If you can’t find your tab, go to Panels – Trace in the top menu bar
Step 2, Click Select Trace Area
Step 3, On your canvas, click and drag and create a grey box around all of your stickers.
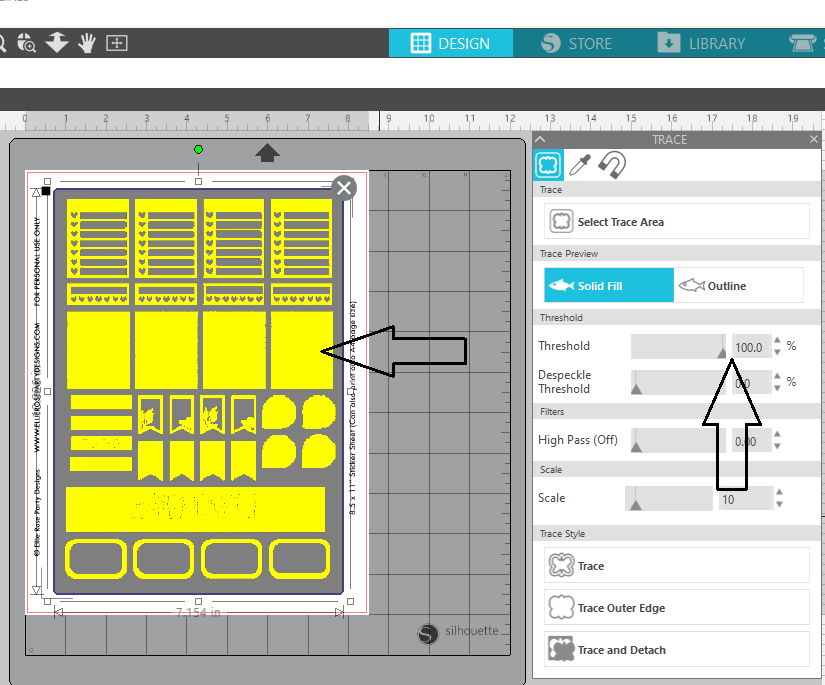
Go over to your Trace panel bar and change the threshold to 100%. You might need to adjust it slights by looking at your canvas to make sure the yellow lines are straight and not pixelated. Also make sure that the high pass filter has been turned off.
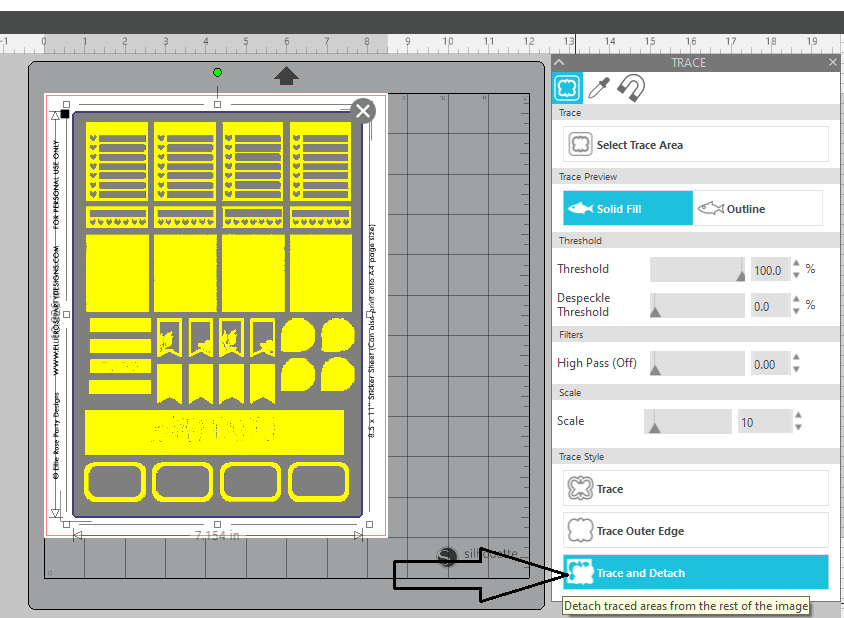
Then, scroll down to the bottom and click Trace and Detach.
This might take a few seconds to finish (depending on the complexity of the design), but what you will end up with is a each planner stickers will be cut out individually on your page.
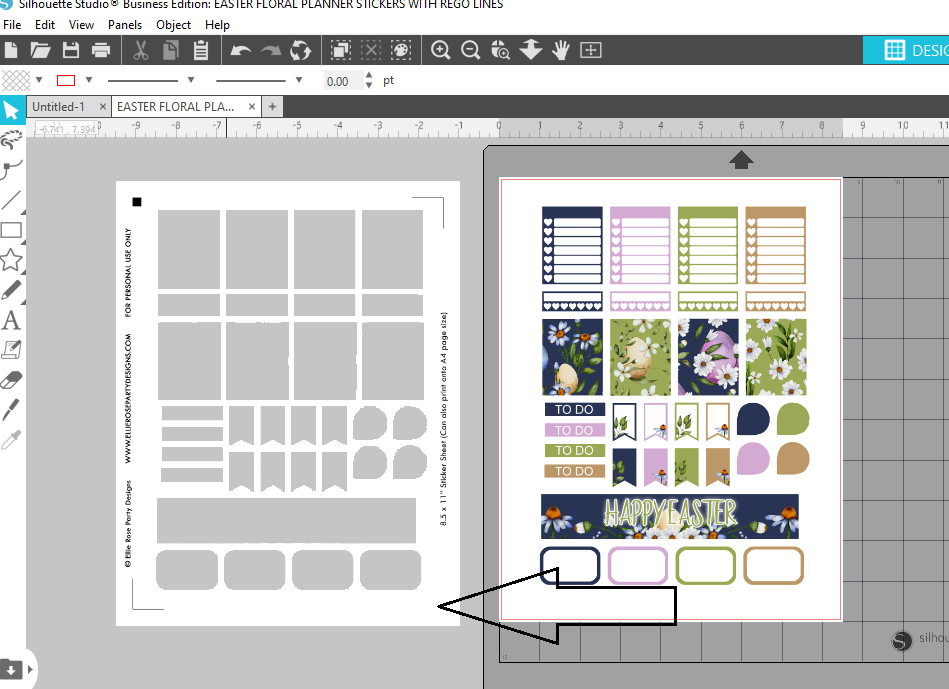
Ok, once that has finished, select the “untraced” area and drag it to the side of your canvas. This is the piece that we don’t need anymore as we don’t want to cut out any of this.
You can delete it. Select it and click delete on your keyboard.
Now it is time to cut out your stickers.
Make sure to print out your PDF file with the registration marks on it. Print on white sticker paper
Place your sticker sheet onto your cutting mat. Make sure you place your sheet of paper onto the cutting mat just like you see it displayed on your computer screen. The little registration marks to be on the top left corner.
Load your cutting mat into your cameo machine.
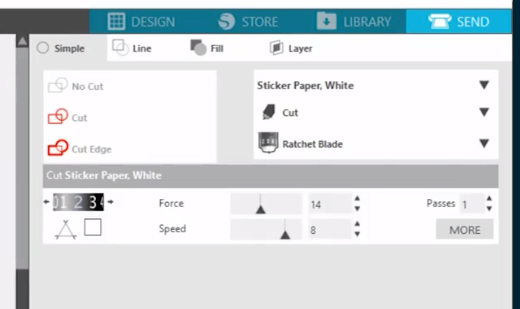
Click the Send Tab
To cut a planner sticker we are going to use the kiss cut method.
Go over to your cut settings, make sure your material is Sticker Paper, White
Make sure that is says Cut and the blade is a Ratchet Blade.
Ratchet Blade should be set at 1
Once you have all your cut settings complete, you will want to send your stickers through the cutting machine but clicking send.
Once finished, you can remove your stickers.
Looking for the free printable?
I have over 100 free party printables located in the Ellie Rose Printable Library. The library is a password protected page for all subscribers. Not a subscriber? No problem! Just enter your details below and you will receive a welcome email with the password to log in!
PLANNER & INSERTS LIBRARY
Enter your name and email address below for instant access to the free printables + other awesome freebies in my weekly newsletter!
SUCCESS!
Please check your inbox or spam folder for more details
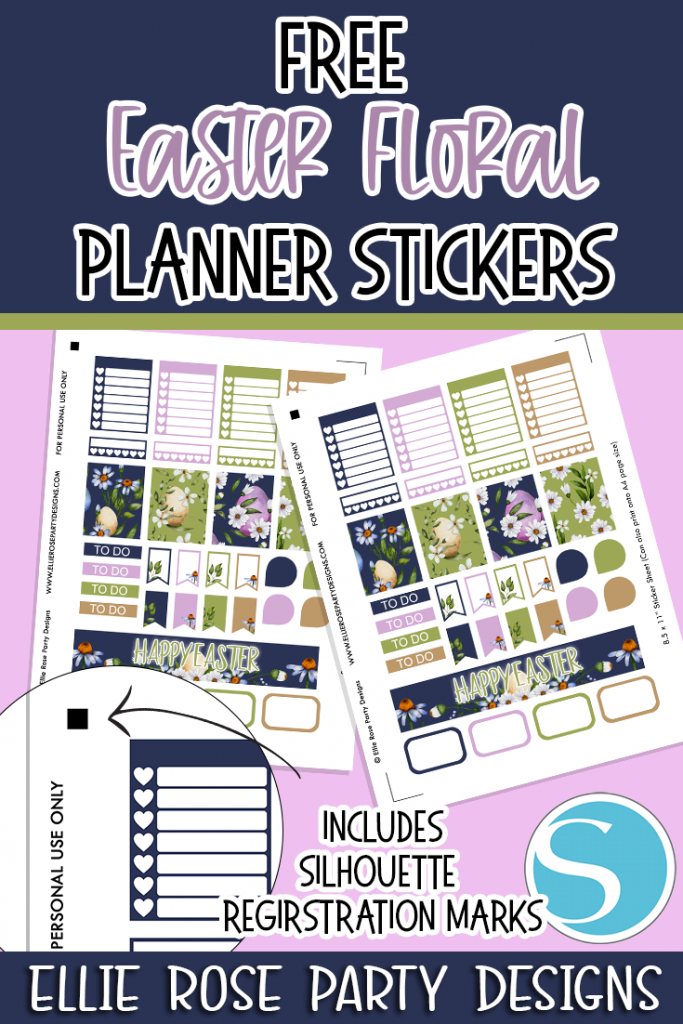
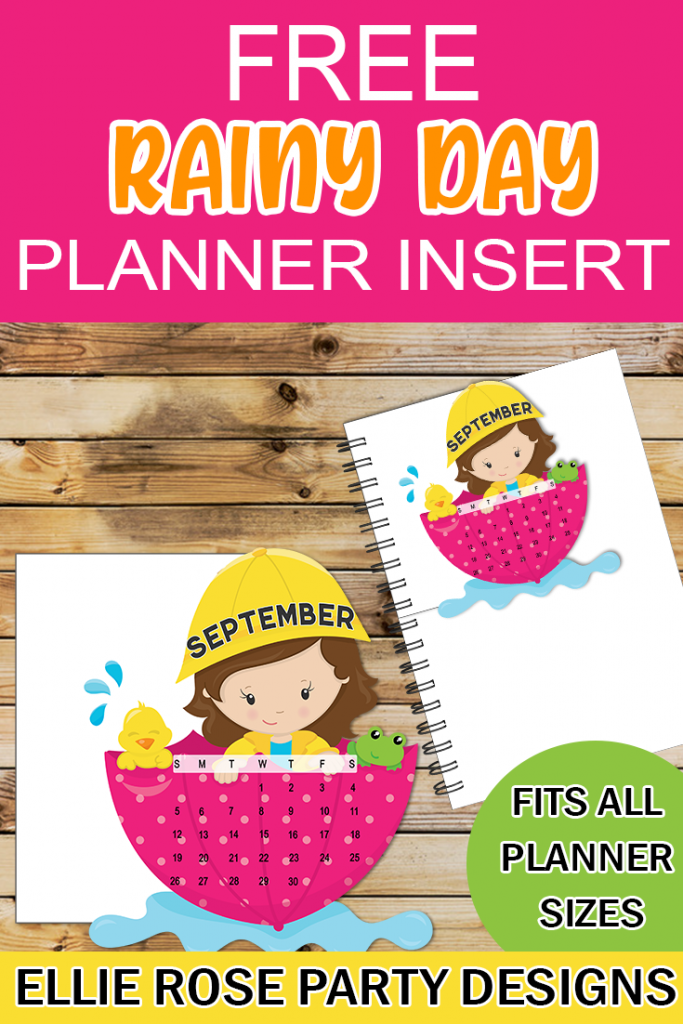
You May Also Like:

If you found these printable useful and give them ago, please be sure to share your photos with me over in my private Facebook Group.
If you would like to share these printables or images on social media please link directly to this blog page. I would love to see how you used this kit & if you have any issues downloading or printing the kits please let me know in the comments section below.
*The printables/ clipart are for private use only and are not to be resold & not for commercial use*
**All copyrights and trademarks of the character images used belong to their respective owners and are not being sold**
***I do not claim ownership over the characters used in my designs***
****This post may contain affiliate links which means that, at no additional cost to you, I may earn a small commission if you make a purchase. Thanks so much for your support in this way! You can read my disclosure policy here.


