This post contains affiliate links. For more information, see my disclosureshere
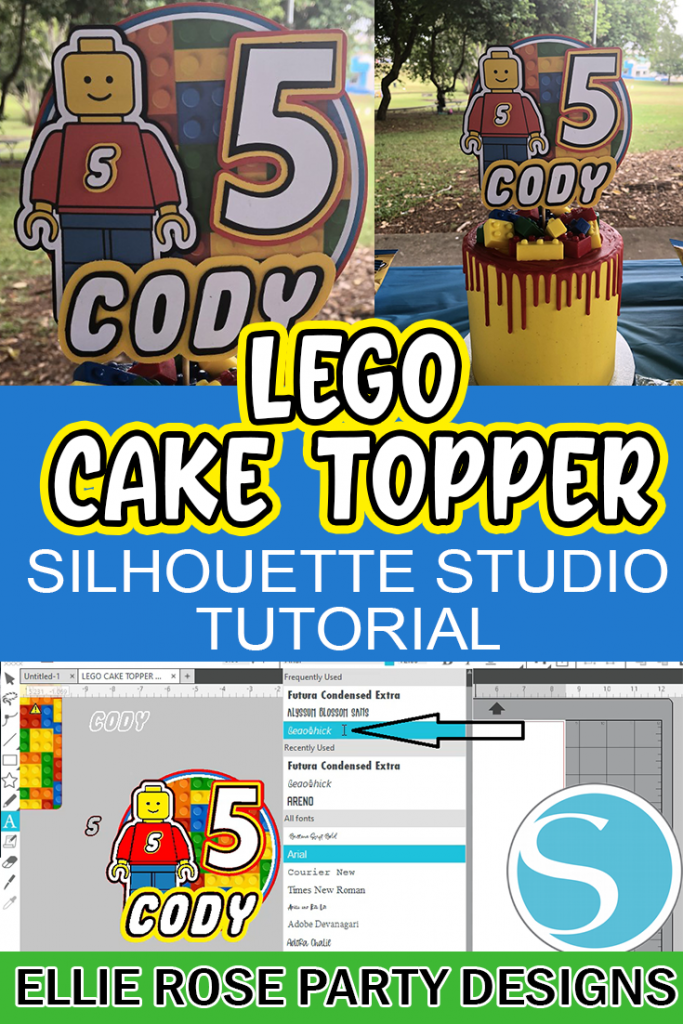
After publishing a photo of my son’s Lego Birthday Cake Topper over in my private Silhouette Studio Facebook Group, I got asked a few times if I would please share a how to tutorial on how I designed my cake topper in Silhouette Studio.
If you aren’t familiar with the Silhouette Studio, it’s an electronic cutting machine that gives you the freedom to create any DIY projects you can think of. I love my Silhouette Studio and all the different things that I can do with it. Especially party decorations for my kids birthdays.
Silhouette Studio software is free for all to download, but most people don’t really know how to actually use it and where to get started. So, today I thought I would get a little techy, and do a step by step tutorial about making Rice Krispie Treats. Then, I’ll show you how to assemble them so you can use and make these for all your parties.
Materials you will need
- Free Silhouette Studio Software
- Upgrade to the Business Addition here
- Lego Font
- Clipart from Google
- Wallpaper from Google
GETTING STARTED WITH YOUR CAKE TOPPER….
Step-by-step video tutorial – Make sure to subscribe to my Youtube Channel
Installation
1. Navigate to silhouetteamerica.com
- Navigate to silhouetteamercia.com
- Click the blue “Update Software” button at the top of the screen
- Under “Silhouette Studio” click the download link. Ensure you choose the correct one depending on your operating system (Windows or MAC).
FOR WINDOWS:
Proceed through the installation process by following the on-screen prompts. If the installation window does not automatically appear, browse to the download in My Computer and double-click the setup.exe program to run it. If a “New Hardware Found” dialog box appears, follow the recommended instructions to accept your system’s installation of the Silhouette driver.
FOR MAC:
Drag and drop the Silhouette Studio application icon into the applications folder to install Silhouette Studio.
Opening the Silhouette Studio Software
Locate the Silhouette Studio icon on the desktop, or in the Start Menu on your PC (in the Applications folder on a Mac).
Double-click the icon to run the application.

Once Silhouette Studio has loaded, you will notice a blank 12” x 12” page on your screen.

Changing Page size & Orientation
If you would like to change the page dimensions or orientation, you will find the page setup options already opened in a separate tab on the right-hand side of the screen.
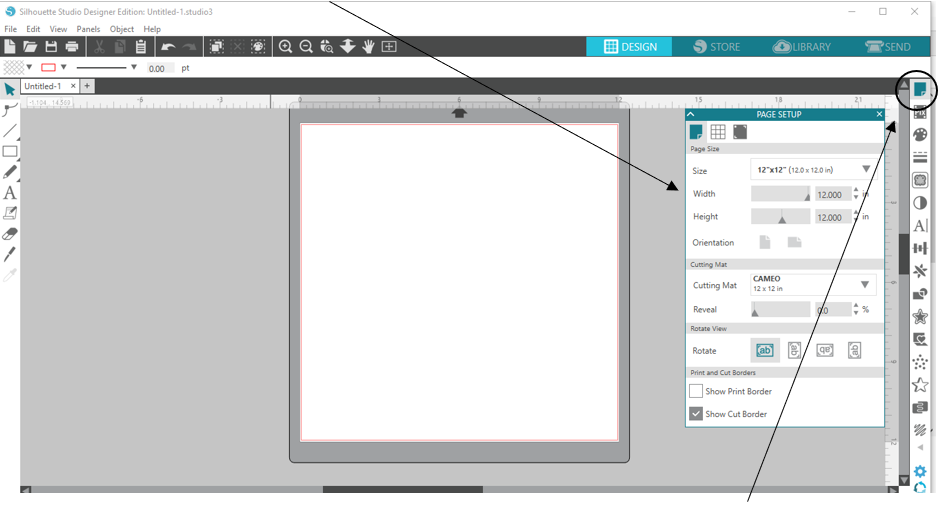
To access these page setup options in the future, click the Page Setup icon in the options toolbar in the upper right-hand corner of your screen.
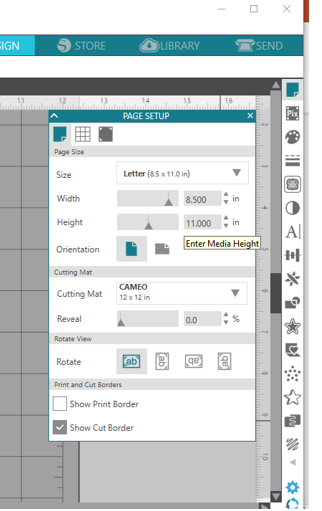
Set your page settings to “Letter Size” (US members) or “A4 size” (Australia). We will be using this size as an example. Welcome to print and cut 12″12″ if you have that size printer.
Select your Clipart & Font
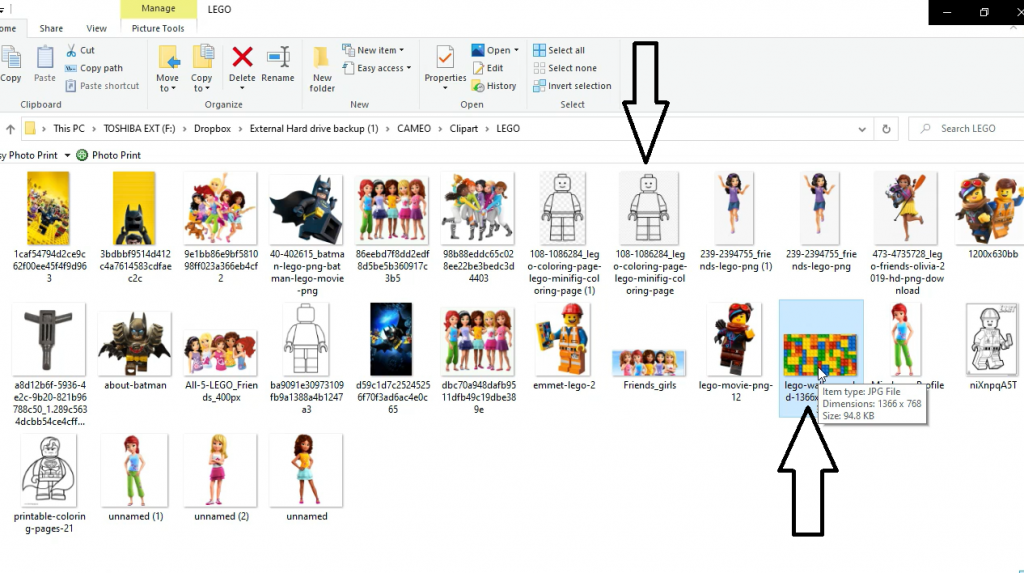
I found my clipart over on Google. I just searched for Lego Coloring Page and for the pattern paper, I searched Lego Wallpaper.
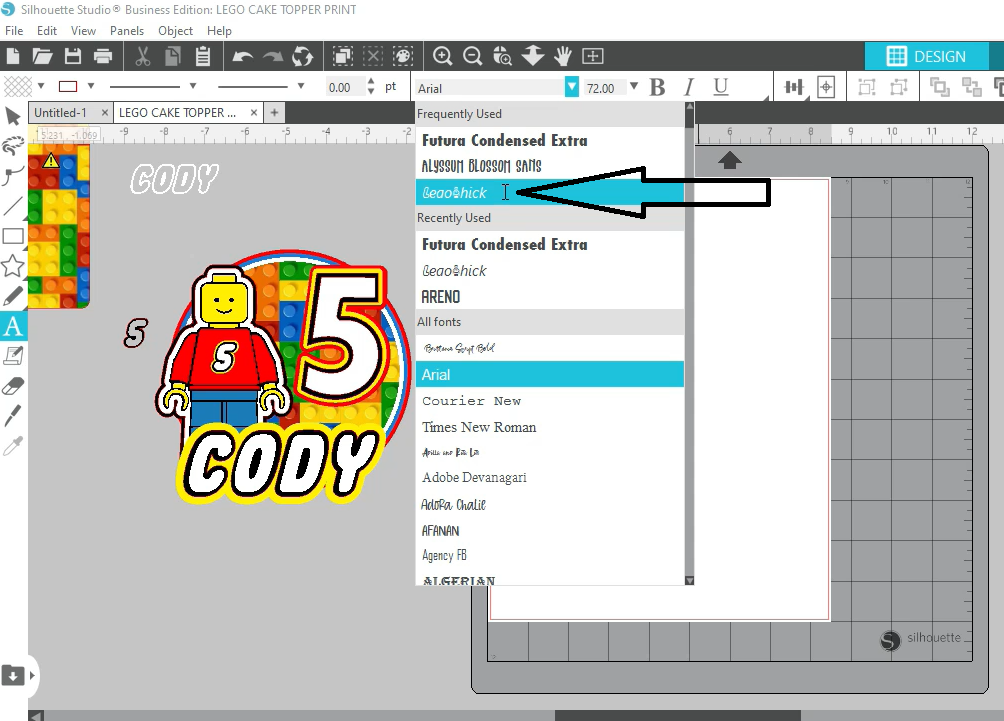
For the clipart, I search for Legothick which I believe is the closest to the original font. I wasn’t able to find the link but that was the name.
Designing your Cake Topper
Select and fill your shape
Hover over your shape tool over on the left, and right click your mouse – select the circle shape.

Push down your Shift Key on your keyboard and click and drag your mouse down over on your canvas. This will keep the shape of the circle.
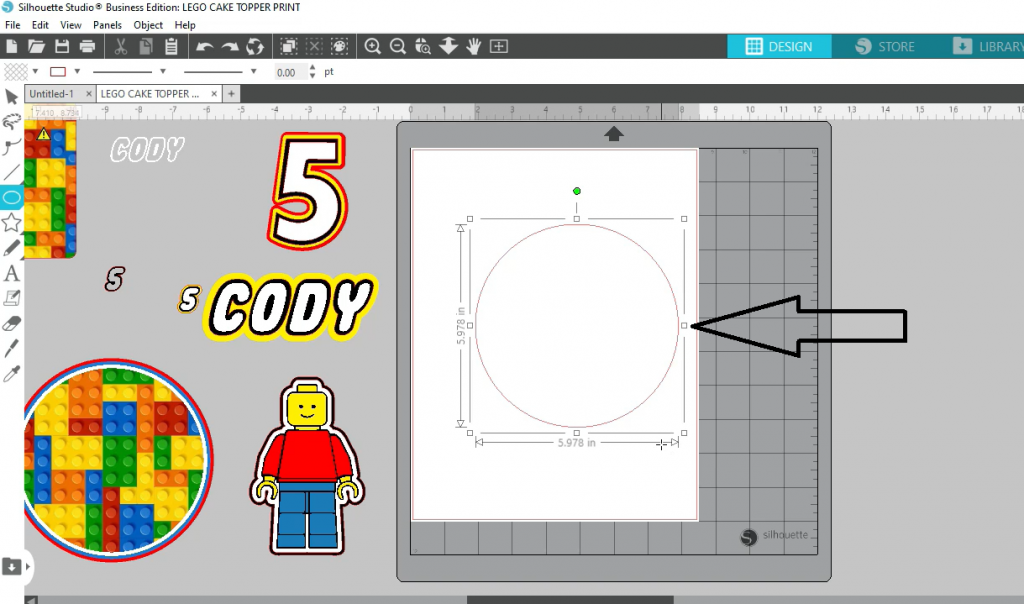
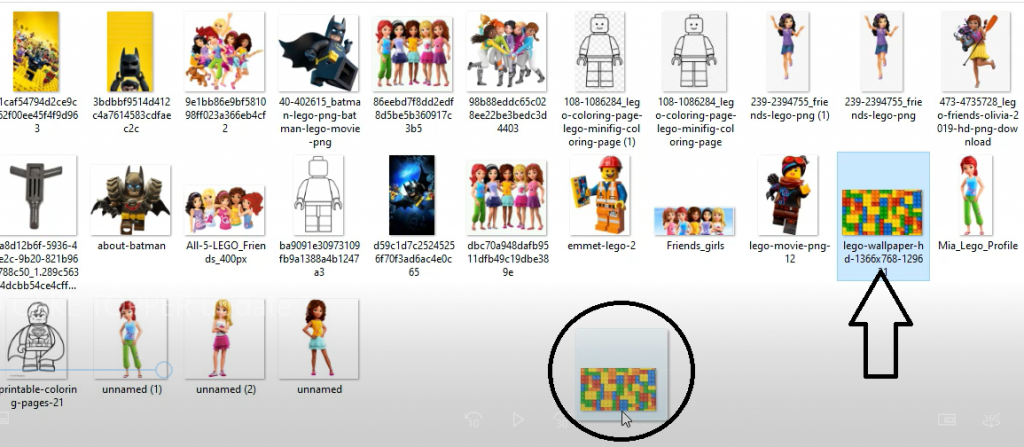
Keep your circle selected, and go over to where you have saved your wallpaper and clipart. Click and drag the wallpaper you want to use over to Silhouette Studio and place it into the shape. It will automatically snap it into the circle shape.

White, Blue & Red Offset
Keep your shape select and head over to the right side tool bar and select Offset Panel. A popup box will appear and select the Offset button.

Enter your distance to be 0.080 and click apply. You will see a circle border around your pattern border.

Go over to your main menu bar on the top left corner and select your colour pallet drop down arrow key and select the colour white. Make sure your circle is still selected.

Repeat these same steps for the blue and red offset circles.
Once done, highlight all 4 layers and group them together. They will become one layer

Creating the Lego Man
Drag your clipart or colouring page into the Silhouette Software.
Select your image and click on the Trace Area Button (No. 1 in image).
Click on Select Trace Area (No. 2).
Highlight and cover the whole area of your design (No. 3).
Drag your threshold to the number your happy with (No.4).
Click Trace (No. 5)
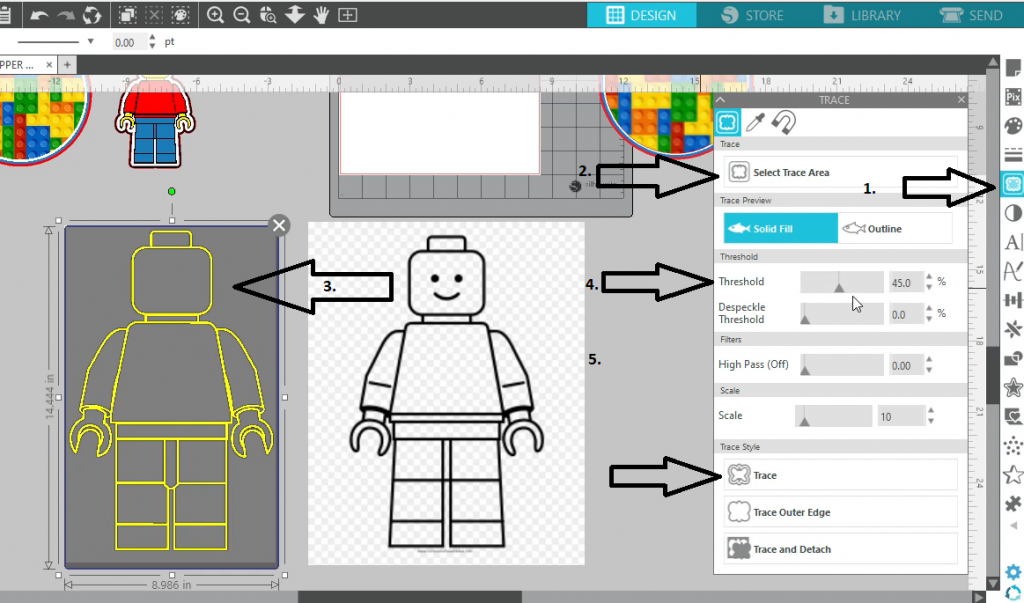

Now you need to ungroup all the shapes. To do that you need to right click on the selected traced image and click Release Compound Path

All the layers are now released and is no longer one layer

Select the outlayer of your man and change the colour to black

Now let’s change all the other colours. Select the head pieces and click on the colour yellow to amend.

Select his shirt and change the colour to red. Keep going until all the pieces have been coloured in. If you have more than one piece that has the same colour you can click shift and hold it down and click on the pieces and select your colour.

To make his face, I saved another colour page to use. Same as before trace it and click trace.

Select the traced part and change the colour to black and place it on your Lego mans face.

Group your layers together and create your offset around your Lego man. I made a white offset and a black offset. Group together once done

Creating the Age (5)
Click on your text button on the left tool bar and then select your font. I went with Futura Condensed Extra. Enter your age and change the colour to white. Place an offset around your number x3. Black, Yellow and Red

Create your name
When creating your name, you apply the same concept as above. Using font named Legothick. Enter your name. Apply 2 offsets


That my friend is how you make a custom Lego Cake Topper in Silhouette Studio.
I hope you found this tutorial useful and will give it ago yourself
Comment below if you have any questions


